.png "Author Photo")
Need estimation?
Leave your contacts and get clear and realistic estimations in the next 24 hours.
Thank you! Your submission has been received!
Oops! Something went wrong while submitting the form.

Table of contentS
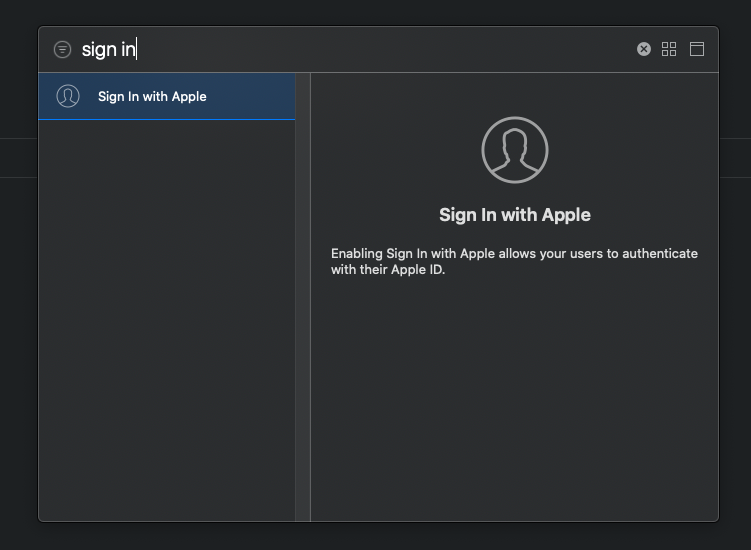
By creating a mobile application, your development team should definitely keep in mind to add the “Sign in with Apple” button on the authorization screen.
In this blog post from the mobile development series, we will share with you step-by-step instructions on how to implement this functionality into your application. But first, let us introduce to you some quick facts about it.
“Sign in with Apple” is a security feature implemented by Apple a year ago. Now, if your app offers another third-party sign-on system, Apple requires it to add the above-mentioned button. Aside from this requirement, the “Sign in with Apple” could be added anywhere you offer the app.
By authorizing the Apple app ID end-users can choose whether or not to share their email with developers. If not, Apple generates a random email address that will forward all emails from this address to the real one.
More about Apple Store review guidelines here.
The app only receives the name of the end-user that is associated with their Apple ID, their email address (verified or the random), and the identifier that allows the app to set up the user’s account in its system.
a) Go to the Apple developer portal;
b) Go to the “Certificates, Identifiers & Profiles” and select section “Identifiers”;
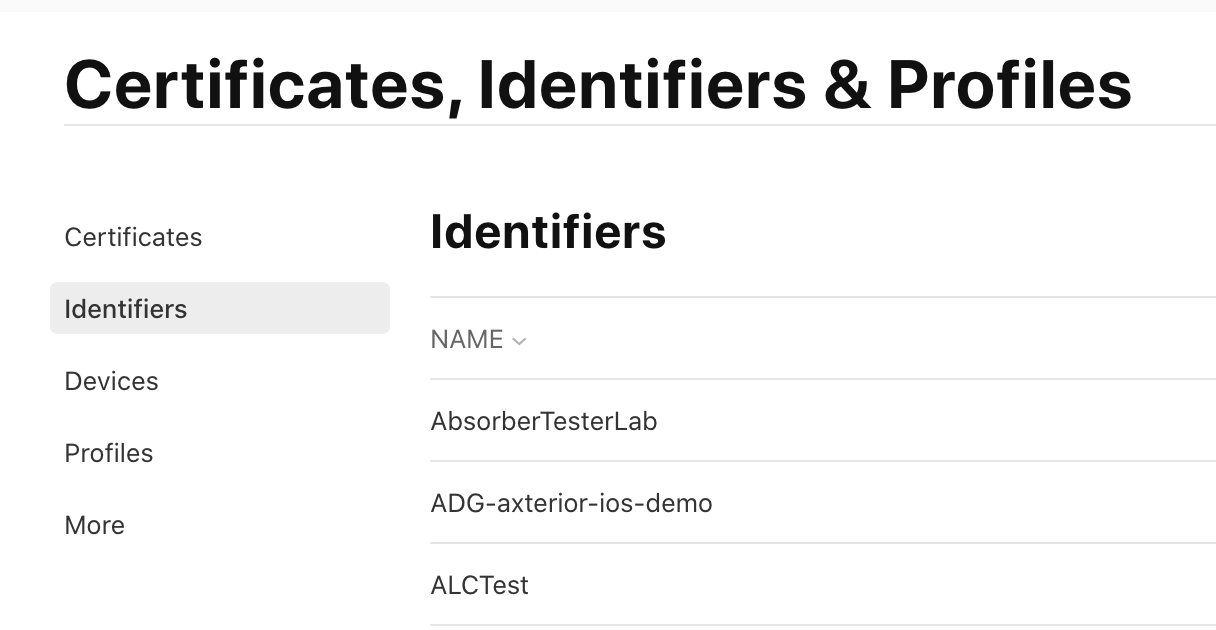
c) Select your “App ID”;
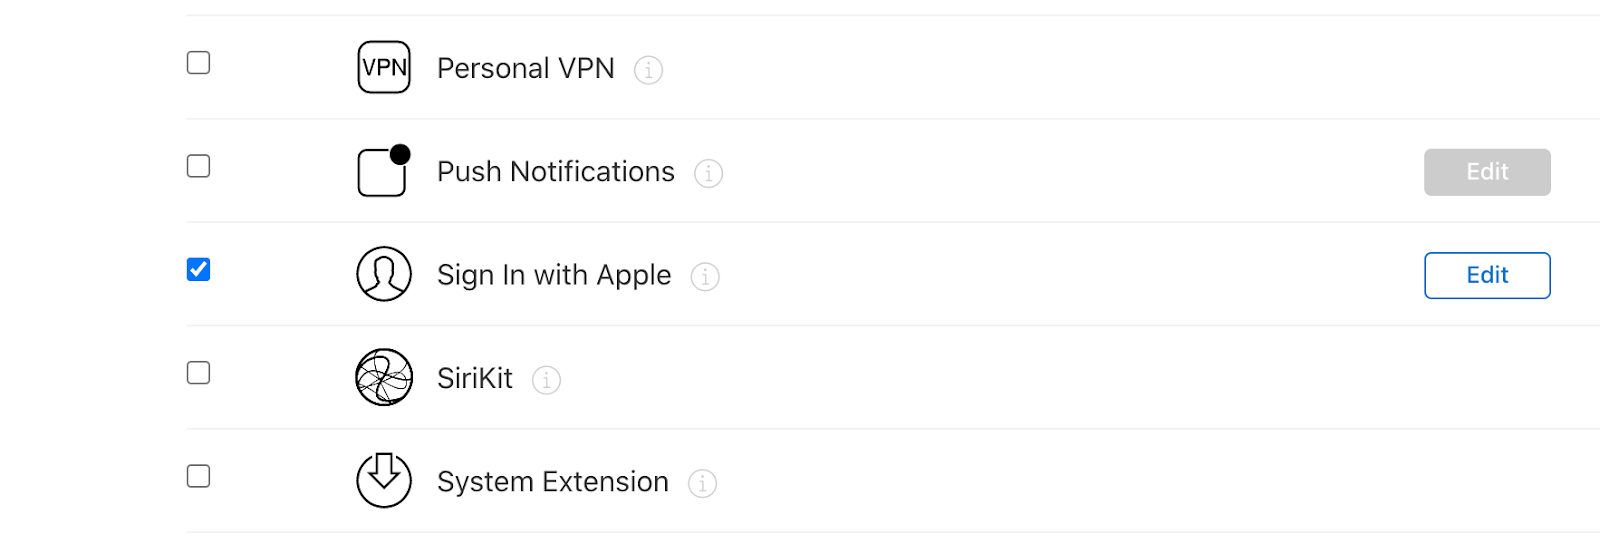
d) Check “Sign In with Apple” capability;
a) Open your Xcode project;
b) Select your project in the left side bar;
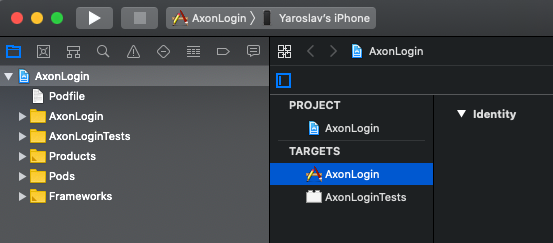
c) Select your target and tab “Signing & Capabilities”;
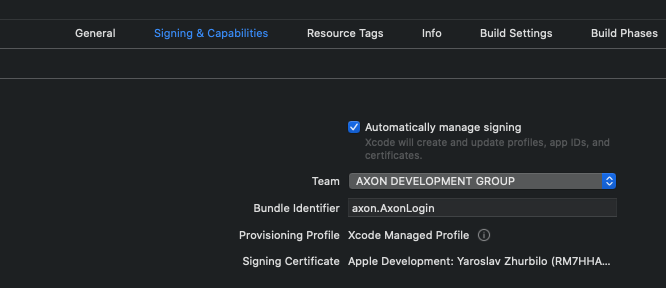
d) Click the “+” symbol and select “Sign in with Apple”.
a) Import the AuthenticationServices;
b) Then, create the button with appropriate type and style;
c) Finally, configure an action on press;
Example of code:
class AuthViewController : UIViewController {

    @IBOutlet private weak var buttonsContainerStackView : UIStackView!

    override func viewDidLoad ( ) {
        super.viewDidLoad ( )
        configureSignInWithApple ( )
    }

    private func configureSignInWithApple ( ) {
        if #available ( iOS 13 , * ) {
            let siwaButton = ASAuthorizationAppleIDButton ( type : .signIn , style : .white )
            siwaButton.addTarget(self , action : #selector(onSignInWithApple ) , for : .touchUpInside )
            buttonsContainerStackView.insertArrangedSubview(siwaButton , at : 0 )
        }
    }
}
import UIKit
import AuthenticationServices
class AuthViewController : UIViewController {
@IBOutlet private weak var buttonsContainerStackView : UIStackView!
override func viewDidLoad ( ) {
super.viewDidLoad ( )
configureSignInWithApple ( )
}
private func configureSignInWithApple ( ) {
if #available(iOS 13 , * ) {
let siwaButton = ASAuthorizationAppleIDButton(type : .signIn , style : .white )
siwaButton.addTarget(self , action : #selector(onSignInWithApple ) , for : .touchUpInside )
buttonsContainerStackView.insertArrangedSubview(siwaButton , at : 0 )
}
}
}a) Create ASAuthorizationAppleIDProvider;
b) Then, configure its request with scopes .fullName and .email;
c) Then, create ASAuthorizationController with request and set presentationContextProvider and the delegate;
d) Finally, configure Presentation Context Provider;
Example of code:
@available ( iOS 13 , * )
private extension AuthViewController {
    @objc func onSignInWithApple ( ) {
        let authorizationAppleIDProvider = ASAuthorizationAppleIDProvider ( )
        let authorizationRequest = authorizationAppleIDProvider.createRequest ( )

        authorizationRequest.requestedScopes = [ .fullName , .email ]
        let authorizationController = ASAuthorizationController(authorizationRequests : [ authorizationRequest ] )

        authorizationController.presentationContextProvider = self
        authorizationController.delegate = self
        authorizationController.performRequests ( )
    }

    func presentationAnchor ( for controller : ASAuthorizationController ) - > ASPresentationAnchor {
        return view.window !
    }
}
@available(iOS 13 , * )
private extension AuthViewController {
@objc func onSignInWithApple ( ) {
let authorizationAppleIDProvider = ASAuthorizationAppleIDProvider ( )
let authorizationRequest = authorizationAppleIDProvider.createRequest ( )
authorizationRequest.requestedScopes = [ .fullName , .email ]
let authorizationController = ASAuthorizationController(authorizationRequests : [ authorizationRequest ] )
authorizationController.presentationContextProvider = self
authorizationController.delegate = self
authorizationController.performRequests ( )
}
func presentationAnchor ( for controller : ASAuthorizationController ) - > ASPresentationAnchor {
return view.window !
}
}a) Conform to the ASAuthorizationControllerDelegate;
b) Then, implement the methods:
- authorizationController(controller: ASAuthorizationController, didCompleteWithAuthorization authorization: ASAuthorization)
- authorizationController(controller: ASAuthorizationController, didCompleteWithError error: Error)
c) Finally, handle the success response and error;
Example of code:
@available(iOS 13 , * )
extension AuthViewController : ASAuthorizationControllerDelegate {
    func authorizationController(controller : ASAuthorizationController , didCompleteWithAuthorization authorization : ASAuthorization ) {

        guard let appleIDCredential = authorization.credential as ? ASAuthorizationAppleIDCredential else { return }

        print("User ID : \( appleIDCredential.user ) " )

        if let email = appleIDCredential.email {
            print("Email : \( email ) " )
        }

        if let familyName = appleIDCredential.fullName?.familyName ,
           let givenName = appleIDCredential.fullName?.givenName {
            print("Family name : \( familyName ) " )
            print("Given name : \( givenName ) " )
        }

        if let identifyToken = appleIDCredential.identityToken ,
           let authorizationCode = appleIDCredential.authorizationCode {
            print("Identity token : \( identifyToken ) " )

            print("Authorization code : \( authorizationCode ) " )
            return
        }
        // TODO : Perform user login
    }

    func authorizationController(controller : ASAuthorizationController , didCompleteWithError error : Error ) {
        print("SIWA error : \( error.localizedDescription ) " )
    }
}
@available(iOS 13 , * )
extension AuthViewController : ASAuthorizationControllerDelegate {
func authorizationController(controller : ASAuthorizationController ,
didCompleteWithAuthorization authorization : ASAuthorization ) {
guard let appleIDCredential = authorization.credential as ?
ASAuthorizationAppleIDCredential else { return }
print("User ID : \( appleIDCredential.user ) " )
if let email = appleIDCredential.email {
print("Email : \( email ) " )
}
if let familyName = appleIDCredential.fullName?.familyName ,
let givenName = appleIDCredential.fullName?.givenName {
print("Family name : \( familyName ) " )
print("Given name : \( givenName ) " )
}
if let identifyToken = appleIDCredential.identityToken ,
let authorizationCode = appleIDCredential.authorizationCode {
print("Identity token : \( identifyToken ) " )
print("Authorization code : \( authorizationCode ) " )
return
}
// TODO : Perform user login
}
func authorizationController(controller : ASAuthorizationController ,
didCompleteWithError error : Error ) {
print("SIWA error : \( error.localizedDescription ) " )
}
}https://www.axon.dev/services/mobile-development
Presto! The button is ready for use. We hope that post was useful to you. We have also shared the instructions on how to implement Apple Pay into the mobile and web application recently.
Are you looking for mobile developers to enhance your application or create one from scratch? Axon can handle it and all your development ideas will be in safe hands. We have years of experience in mobile development and strong expertise in different industries. Feel free to contact us!
In our next blog post from the mobile development series we are talking about fresh mobile app development trends in 2021. Learn more!
Yes, Apple requires apps that use third-party login options (like Google or Facebook) to also include “Sign in with Apple.” This ensures consistency in privacy and user experience across all apps distributed via the App Store. Failing to include it may result in App Store rejection.
When users sign in, developers receive a user identifier, full name (only on first login), and either the user's real email or a private relay email generated by Apple. This privacy-focused approach ensures that users control the data they share.
To set up “Sign in with Apple” in an iOS app, you first need to enable the feature in the Apple Developer portal under your app’s identifiers. Then, configure the appropriate services and create the necessary keys. After that, implement the authentication code in your app using Apple’s AuthenticationServices framework to handle user sign-in securely. Finally, test the integration thoroughly before submitting your app to the App Store.
Free product discovery workshop to clarify your software idea, define requirements, and outline the scope of work. Request for free now.


[1]
[2]
Leave your contacts and get clear and realistic estimations in the next 24 hours.