.png "Author Photo")
Need estimation?
Leave your contacts and get clear and realistic estimations in the next 24 hours.
Thank you! Your submission has been received!
Oops! Something went wrong while submitting the form.

Table of contentS
No more need to carry credit cards with you, just touch the iPhone screen with your finger (Touch ID) or just smile at the screen (Face ID) and the purchase will be confirmed! What does it mean for business? Let's find out.
The popularity of Apple Pay began to grow along with the popularity of contactless payments in general due to the coronavirus pandemic.
Apple Pay has over 500 million registered users worldwide, and it accounts for more than 92% of the entire mobile debit wallet market.
Since Apple released Apple Pay, and the magic button “Pay with Apple Pay” has appeared in web and mobile apps, online shopping has become much easier.
If you are planning to build an application or website where you will sell some goods or services, integrating Apple Pay will help you to make it more user-friendly.
Besides its convenience, Apple Pay is also secure. While purchasing within apps and on the web in Safari actual card numbers of end-users aren’t stored on devices or on Apple servers. The merchant only receives information like name, email address, billing, and shipping addresses that end-users authorize to share to fulfill their orders.
In this post from the mobile development we are going to show you how to integrate Apple Pay into your application or website.
Make sure that Apple Pay is available in your country and find a payment provider that supports Apple Pay in your region.
Merchant ID tells the payment processing systems involved in a transaction where to send which funds. To create it log in to your Apple Developer Account and go to “Certificates, IDs & Profiles”. Choose “iOS, tvOS, watchOS” from the pop-up menu. Tap “App IDs” in the “Identifiers” section.

Create a new iOS App ID by clicking the “+” button. Choose the App ID section on the next page and fill the “Description” field with the name of your App ID.
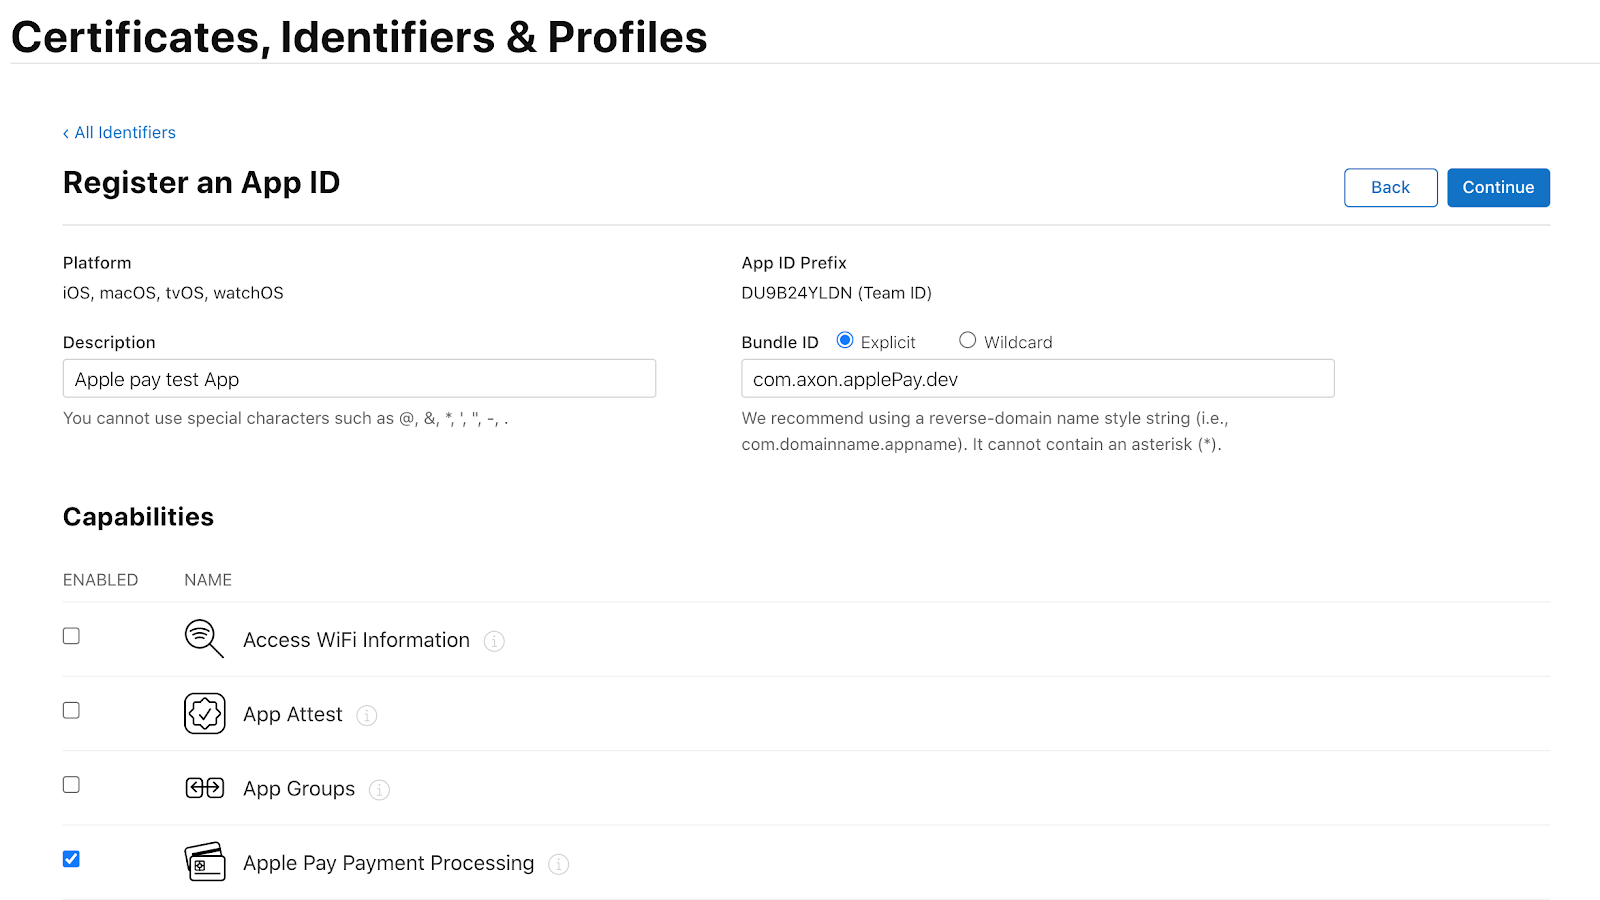
Fill the “Bundle ID” field as explained further. Then, go to the “Capabilities” section and choose “Apple Pay Payment Processing”.
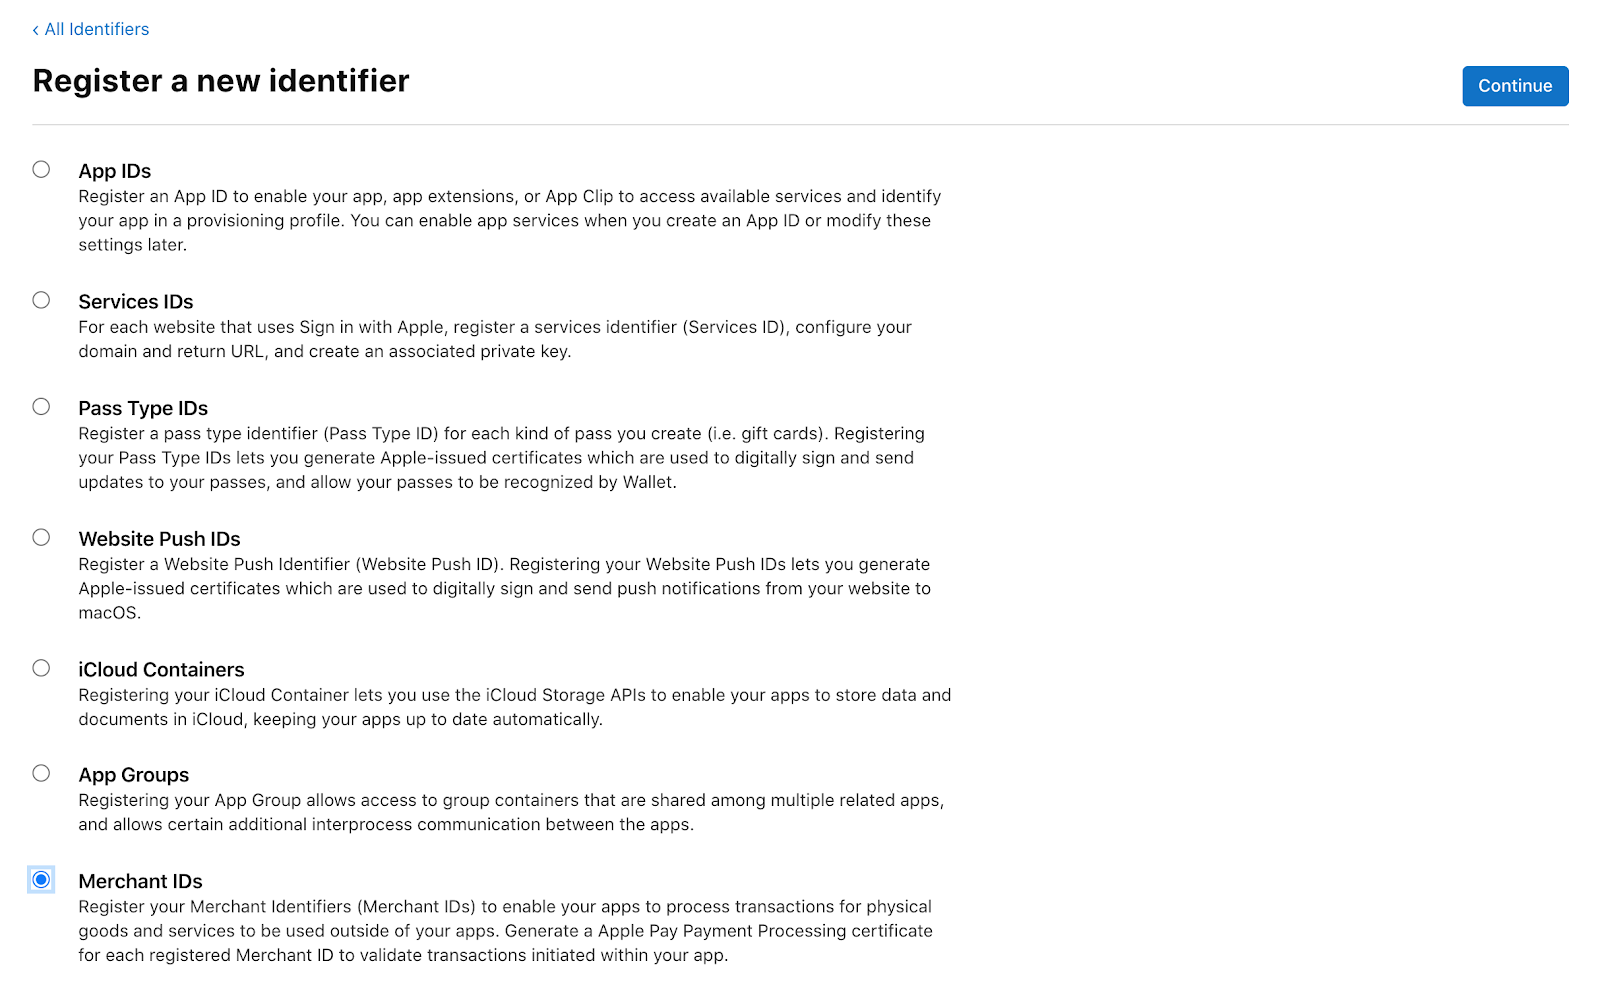
Next, on the Identifiers Page choose “+” and select the “Merchant ID” section to add the new one by clicking the “Continue” button on the page.
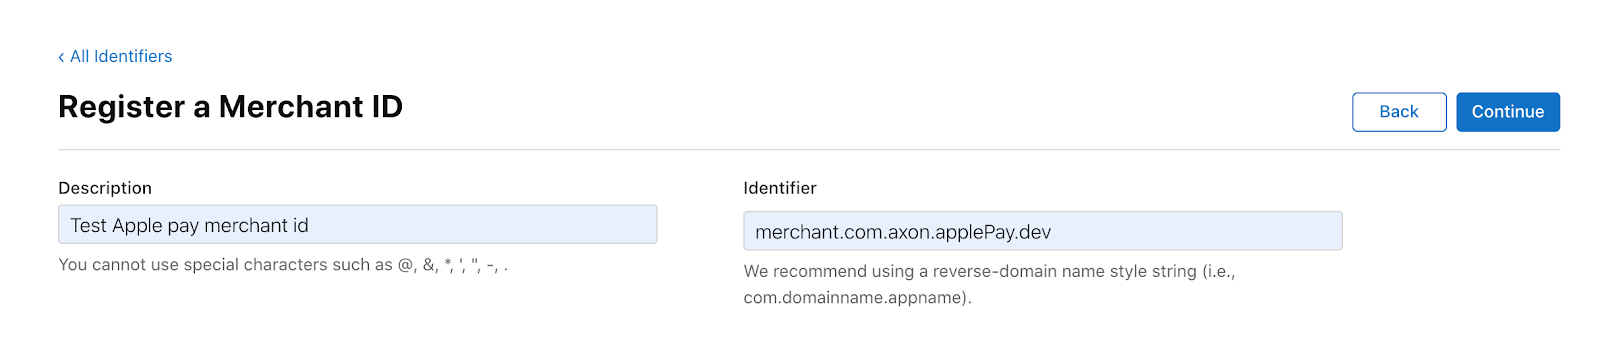
Fill the “Description” field, where you can enter the name of your application or website.
An “ID” field is then filled using the following format “merchant.com.YourAppName”.
Then click the “Continue” button.
Back to the “App ID” in the “Identifiers” section. We have just created the new App ID, so all that needs to be done here is to choose “Apple Pay Payment Processing”.
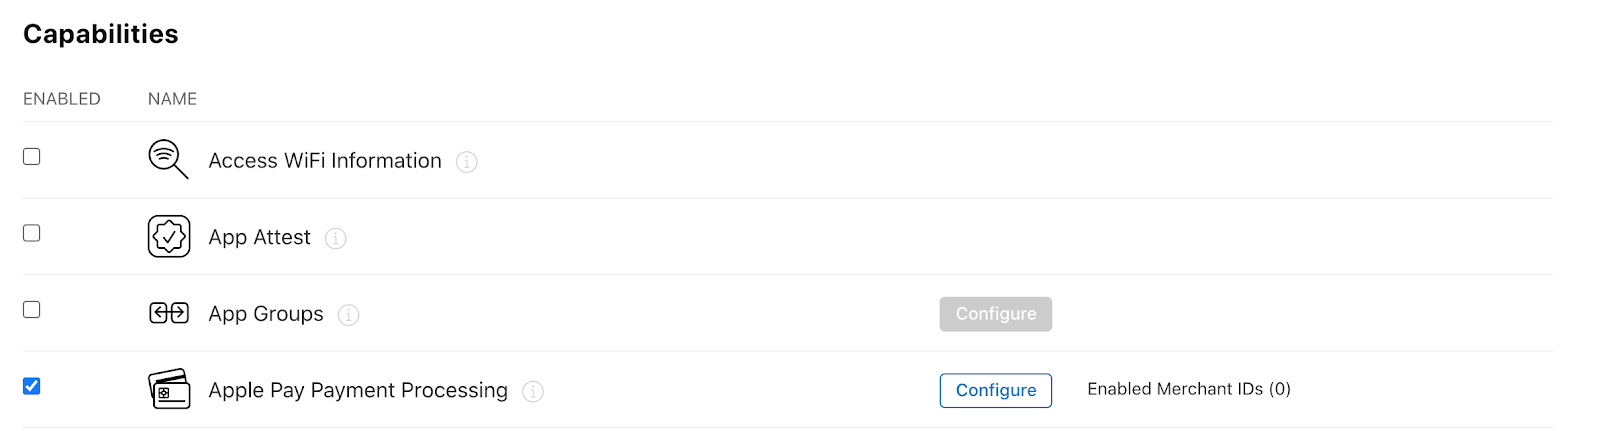
Next select your Merchant ID in the “Merchant ID Assignment” section.
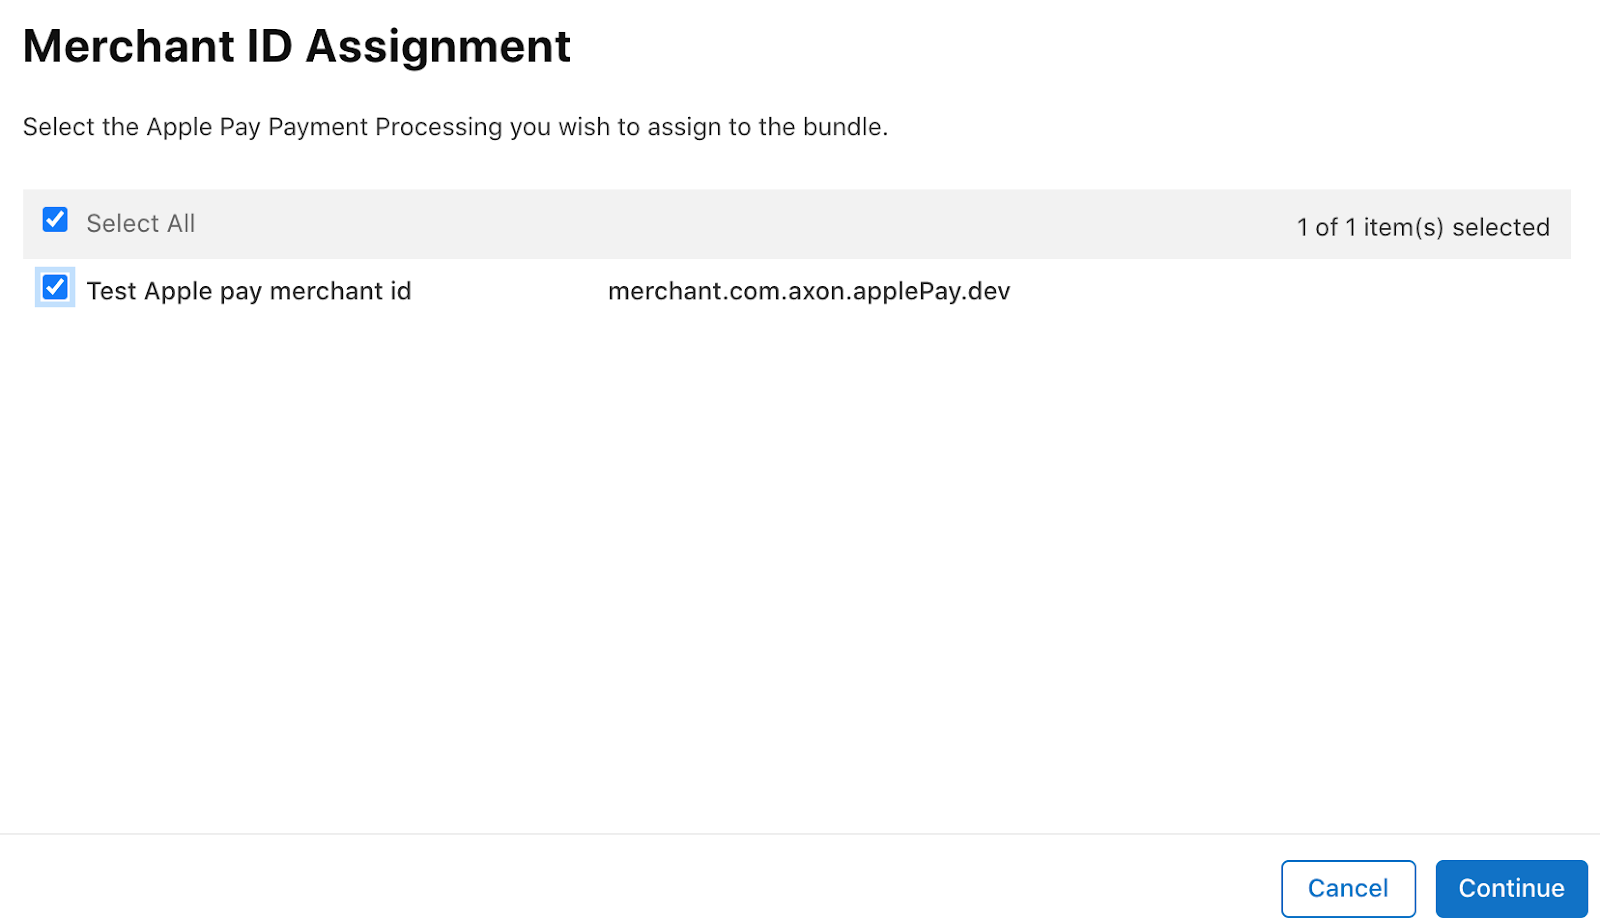
And that's it.
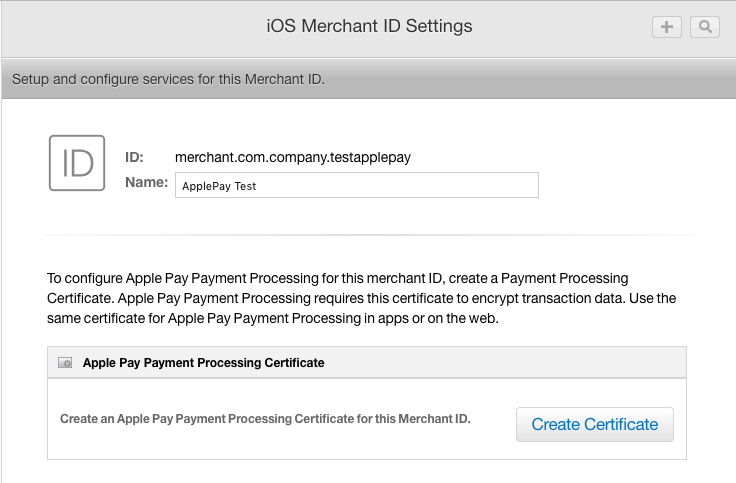
To make outgoing payment data for users safe, you need to create a Payment Processing Certificate.
To start creating a Payment Processing Certificate, go to the “Certificates, Identifiers & Profiles” section → “Identifiers” → “Merchant IDs”. Select the “Merchant ID” and click “Edit”.
After the “Payment Processing Certificate” is opened, click the button “Create Certificate”
After this click “Choose file” and select the CSR file that has the .certSigningRequest extension. Click “Continue” → “Download” → “Done”.
Got it! We’ve finished setting up the basic settings for Apple Pay. Now if you want to integrate Apple Pay into your mobile application, follow the steps in the next paragraph. If you prepared Apple Pay for the website, skip it and go to the paragraph on “How to integrate Apple Pay into a website?”
Open the XCode and tap the “File” icon in the upper left corner.
Go to XCode and click the file icon in the upper left corner. Choose the target project and move to the “Capabilities” section. After it has opened, turn on the “Apple Pay” section.
After refreshing the page you will see your Merchant ID in the “Merchant IDs” section.
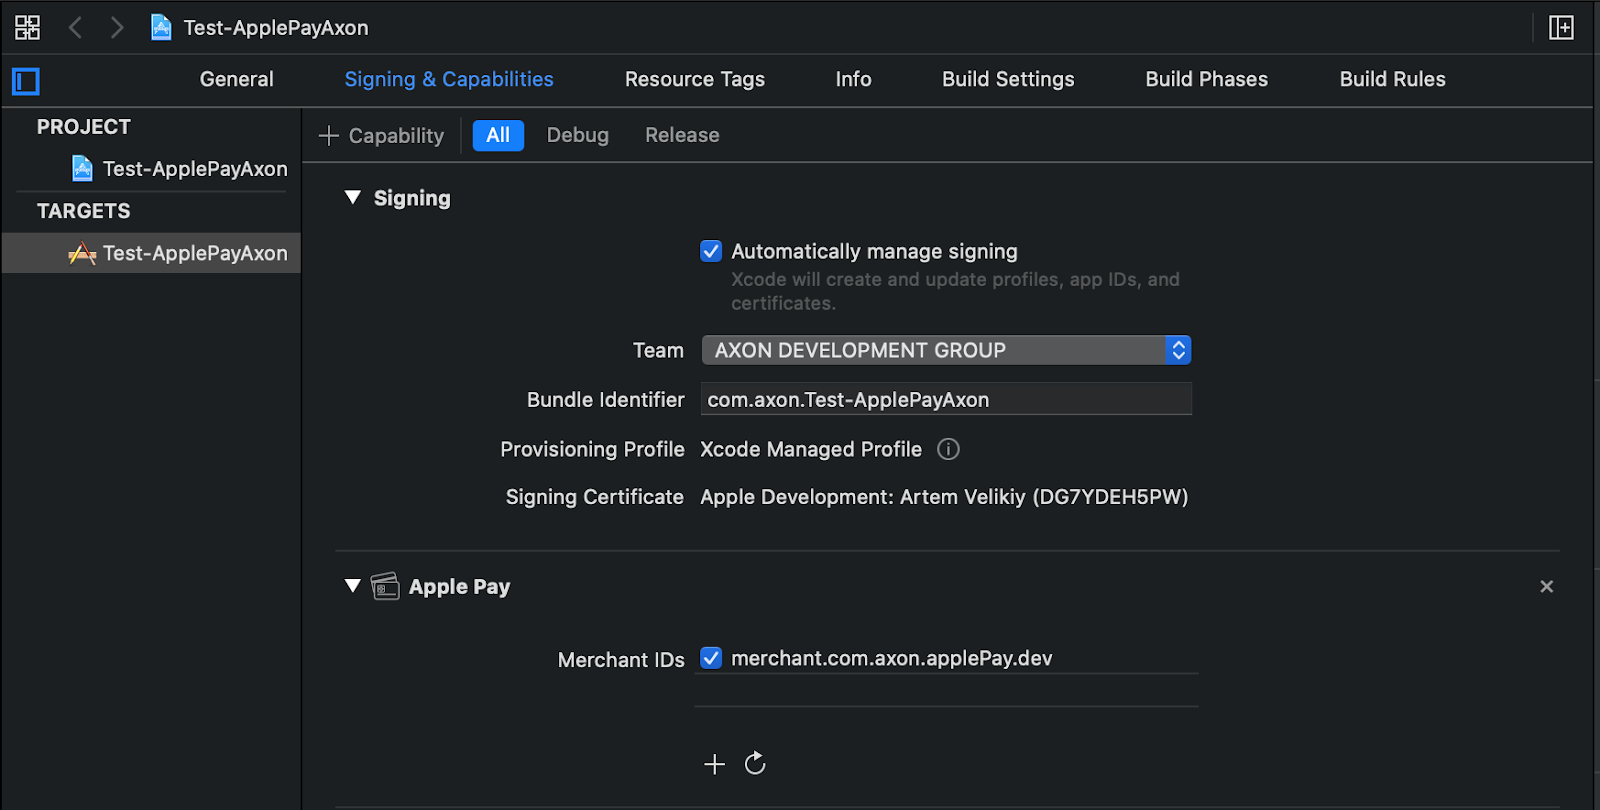
In the event you have used the “Automatically manage signing” the system will create a merchant identity certificate automatically.
Get inspired by our recent blog post about iOS app development cost!
For authentication of communication between Apple Pay servers, you need to create a Merchant Identity Certificate.
To create a Merchant Identity Certificate go to “Certificates, Identifiers & Profiles” → “Identifiers” → “Merchant IDs”. Choose your Merchant ID and click the button “Edit”.
Move to the “Apple Pay Merchant Identity Certificate” section and press the button “Create Certificate”.

Next click “Choose file” and upload your CSR file (look at the paragraph Create Payment Processing Certificate)
After that, click “Choose file” and choose your CSR file to upload. Next click “Choose” → “Continue” → “Download”.
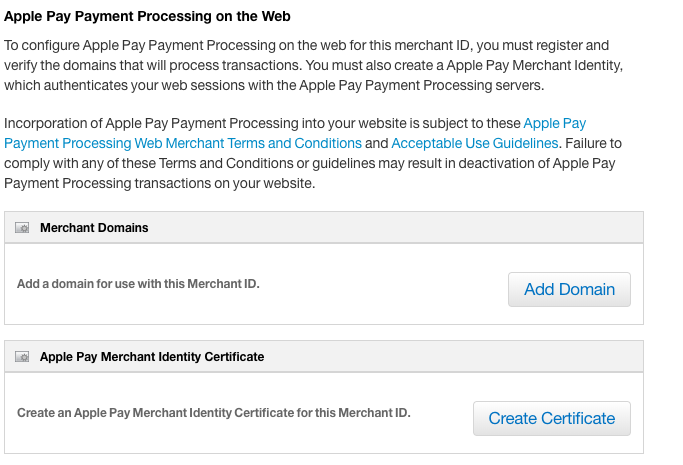
After the Merchant Identity Certificate for your website has been created, you’ll need to register and verify the domain of your website.
To do this go to “Certificates, Identifiers & Profiles” → “Identifiers” → “Merchant IDs”. Choose your Merchant ID and click the button “Edit”.
In the “Merchant Domains” section, click the “Add Domain” button.
Enter your domain name and click “Continue” → “Download”.
The text file is generated and available to download. Download this file and host it to the provided URL path, this file will be valid for 7 days.
As soon as the file is made available on your server click the “Verify” button.

We have finished the preparation stage and now to completely integrate Apple Pay into your mobile application or website, here will be needed programming skills.
Here APIs need to be used that will determine whether the end-user’s device can support Apple Pay.
Let’s implement Apple Pay into the mobile application by utilizing a PassKit framework:
When the new project is created and Apple Pay capability is On.

Lets go to ViewController and add display error func

Then let’s create a simple model of our Goods with a price and name.

Add constant with Sneakers for 1000 $.

After that simply add button with the following code:
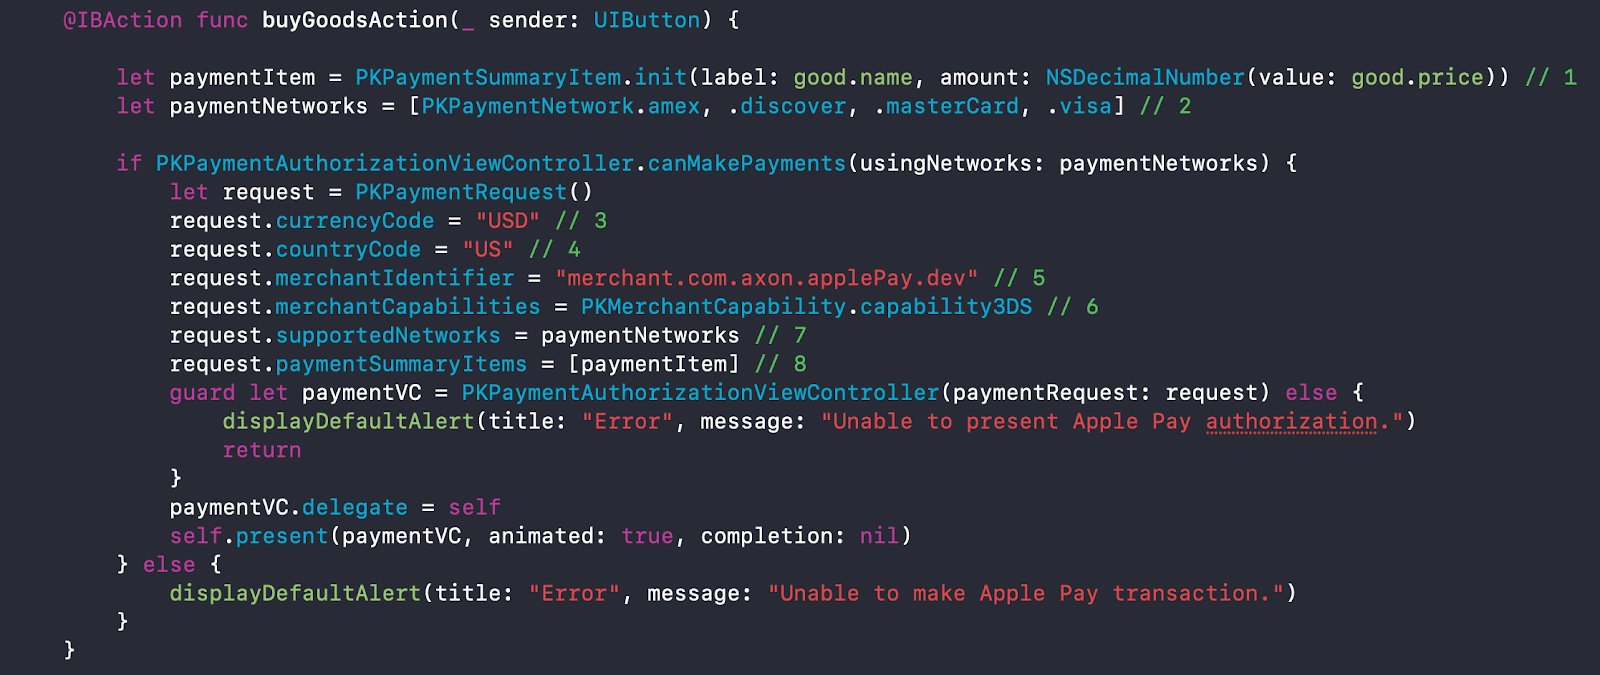
Step 1 Creation of a Payment Item based on Goods we have.
Step 2 Addition of supported payment cards.
Step 3 Currency for transactions and transfers.
Step 4 Setup for country code.
Step 5 Previously created identifiers.
Step 6 Verifies the type of transaction. PKMerchantCapability.capability3DS and uses the 3-D Secure protocol, a secure way of processing debit and credit cards.
Steps 7 and 8 Uses payment networks and payment items we created previously. This is only basic information; you can add more information in the request, such as the billing information, shipping methods, and supported countries. You can also check the full list of properties.
To get callback on transaction success we can use this protocol
PKPaymentAuthorizationViewControllerDelegate

To integrate Apple Pay into the website, use JavaScript-based APIs, and a detailed guide on how to do it.
Note: these JS-based APIs are available only for Safari

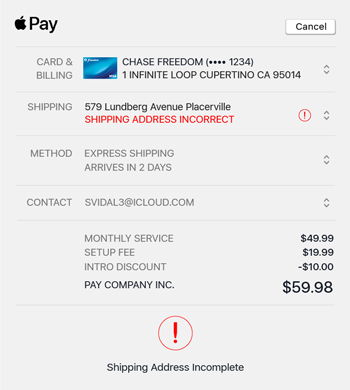
You can create a customizable payment sheet that is open after the end-user taps the Apple Pay button. The Payment sheet in your application/website can also include additional charges, discounts, pending costs, as well as add-on donations.
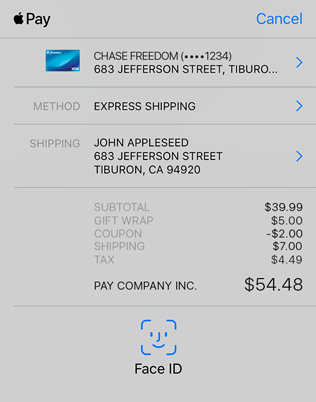
To learn more about customization of payment sheets go here.
We did it! The integration of Apple Pay into the application/website is finished! Congratulations!
You simply have to integrate technology into your business, project or daily life. Thanks to Apple Pay technology, you can almost completely abandon the use of plastic cards.
If you have any ideas on integrating different features into your project but don't have technical expertise, you can rely on the professional tech team. Axon provides companies with senior product development expertise to build world-class software. Let's talk about how we can help you.
Apple Pay offers users a fast, secure, and convenient payment method that reduces checkout friction. It can improve conversion rates, build customer trust through enhanced security, and support seamless payments on Apple devices.
You need to set up an Apple Developer account, enable Apple Pay capabilities, configure your merchant ID, and comply with Apple’s guidelines for user privacy and security. Additionally, ensure your app or website supports HTTPS for secure transactions.
Yes, Apple Pay supports integration in native iOS apps and websites accessed via Safari. App integration typically uses Apple’s Payment APIs, while website integration involves adding Apple Pay buttons with JavaScript and setting up payment processing on the backend.
Free product discovery workshop to clarify your software idea, define requirements, and outline the scope of work. Request for free now.


[1]
[2]
Leave your contacts and get clear and realistic estimations in the next 24 hours.