Need estimation?
Leave your contacts and get clear and realistic estimations in the next 24 hours.

Table of contentS
We typically spend most of our workday in our IDEs. And as modern IDEs have become very powerful, we have often failed to utilize them to their full potential. This post from the mobile development series provides a brief description of tips and tricks on how to make Android Studio work for you, so that you spend less time by typing and navigating and more time by actually building things.
Ctrl + Shift + Enter
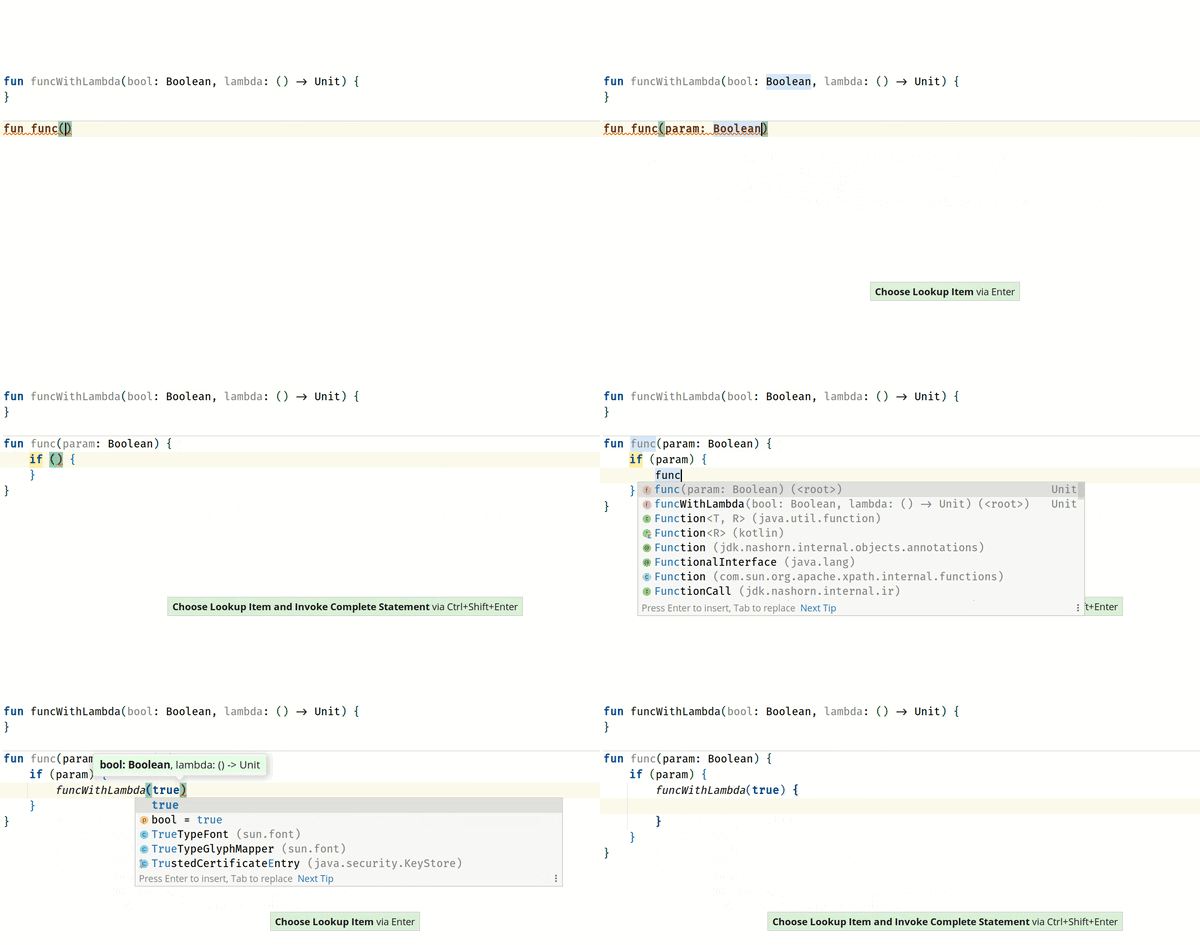
IntelliJ automatically adds missing braces, or just moves a cursor to the next line.
Shift + Enter
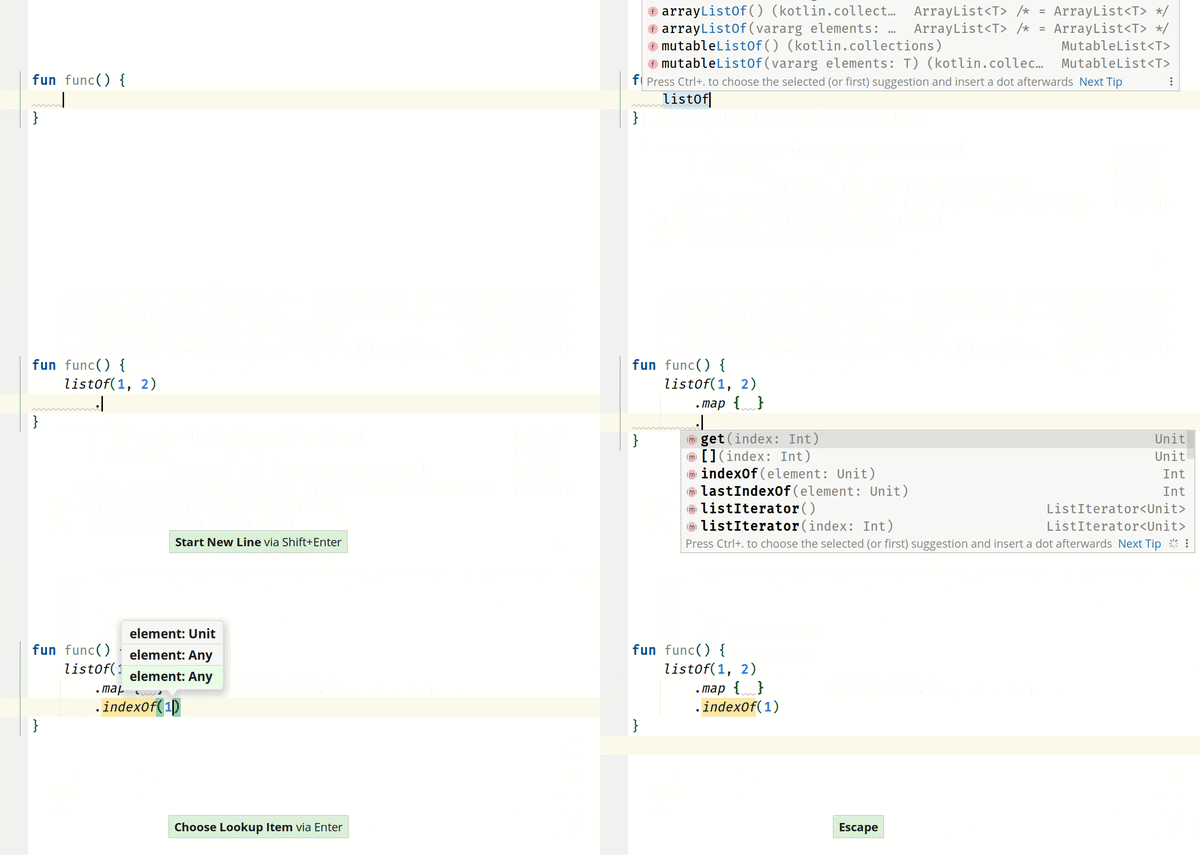
This is useful when dealing with chained calls.
Double Ctrl + arrow keys
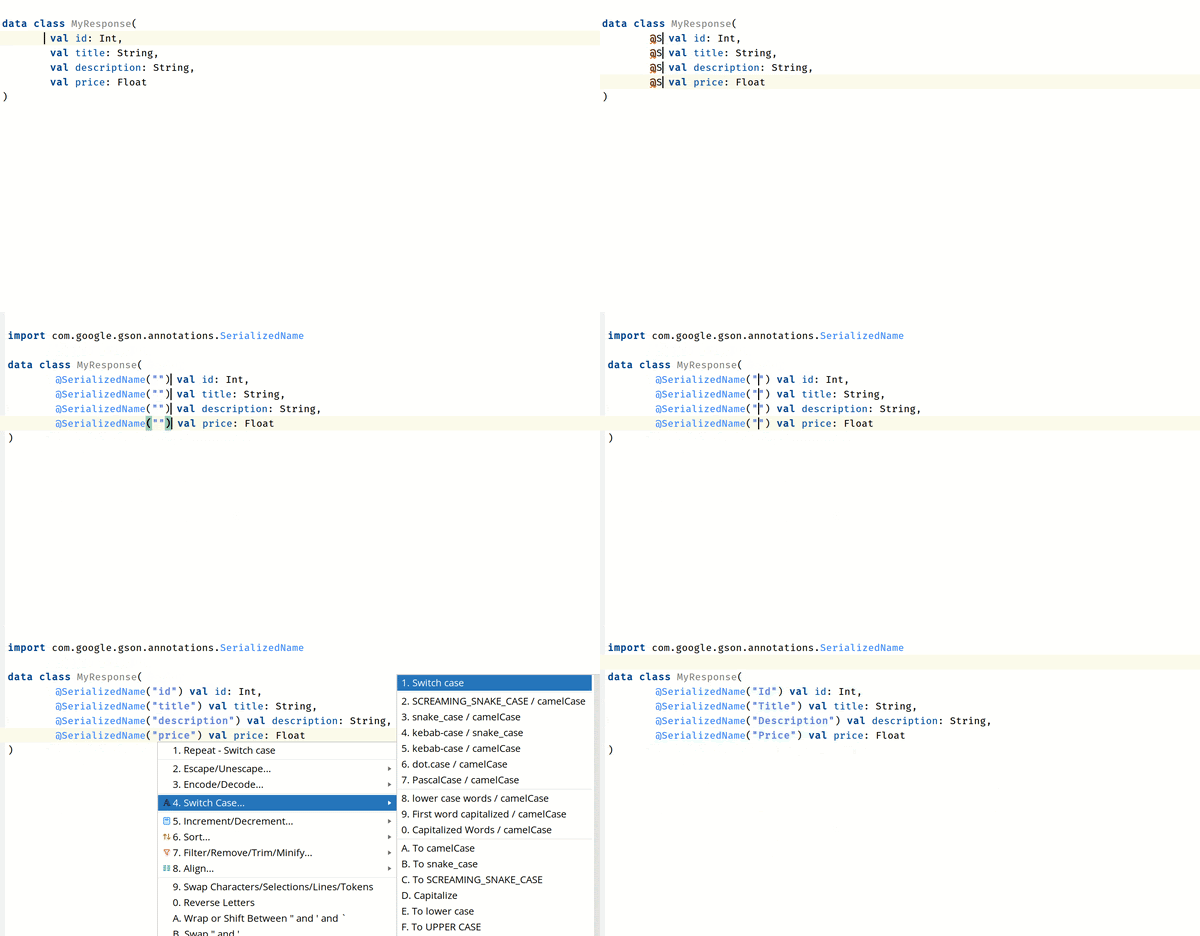
For bulk editing similar codes.
The last pop-up on the GIF is aptly named the String Manipulation plugin.
Alternatively, to create a separate caret you can also use:
To delete all added carets, press Escape.
Alt + Shift + Insert
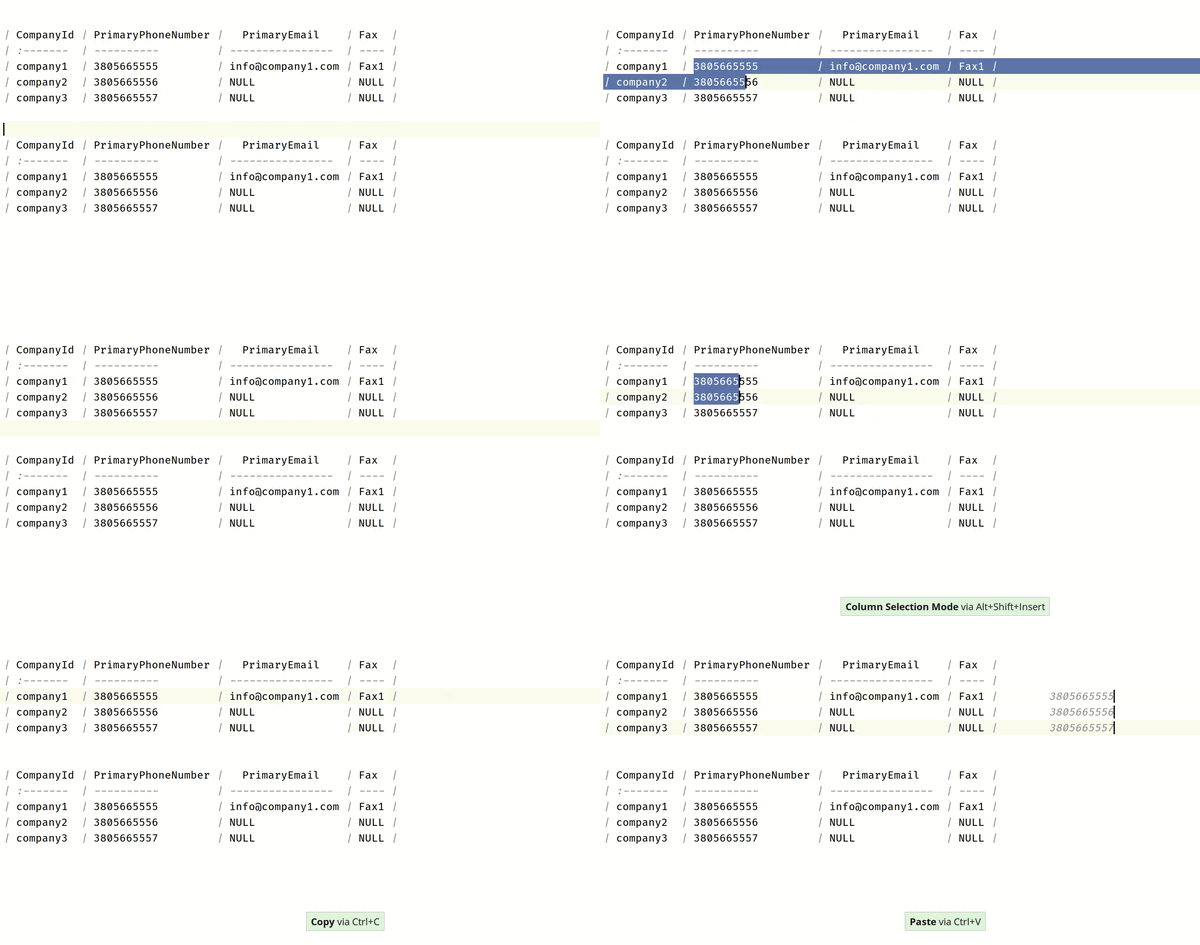
By default, IntelliJ uses a line selection mode. You can press Alt + Shift + Insert at once to enable the column selection mode. Press Alt + Shift + Insert again to return to the line selection mode.
Ctrl + Y
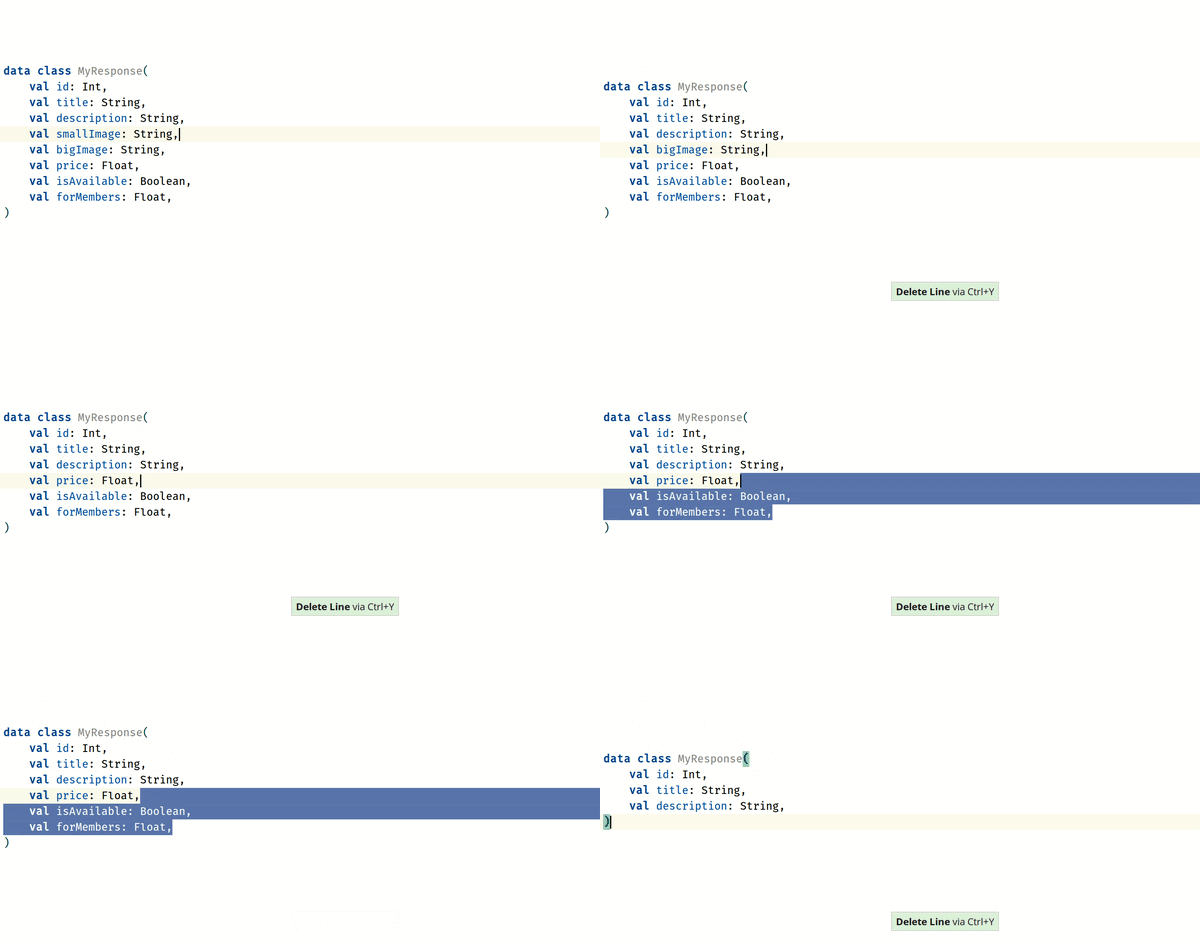
Delete one or multiple lines.
Learn more about technology stack for Android application.
Changelist is basically a way to divide your Git staging area into several groups. By default, IntelliJ has only one “Default Changelist”, but you can also create your own.
You can also “shelve” changelists, similarly to git stash, but from our point of view the IntelliJ variant to be much more powerful.
You may also use Shelf to store code for manual testing. For example, a piece of code to temporarily make you a premium user. Or use hard coded fake server responses, so that you can test how your app behaves to certain responses.
You can take a look at IntelliJ reference here and here for further information on how to create, manage, and shelve changelists.
Ctrl + Shift + V
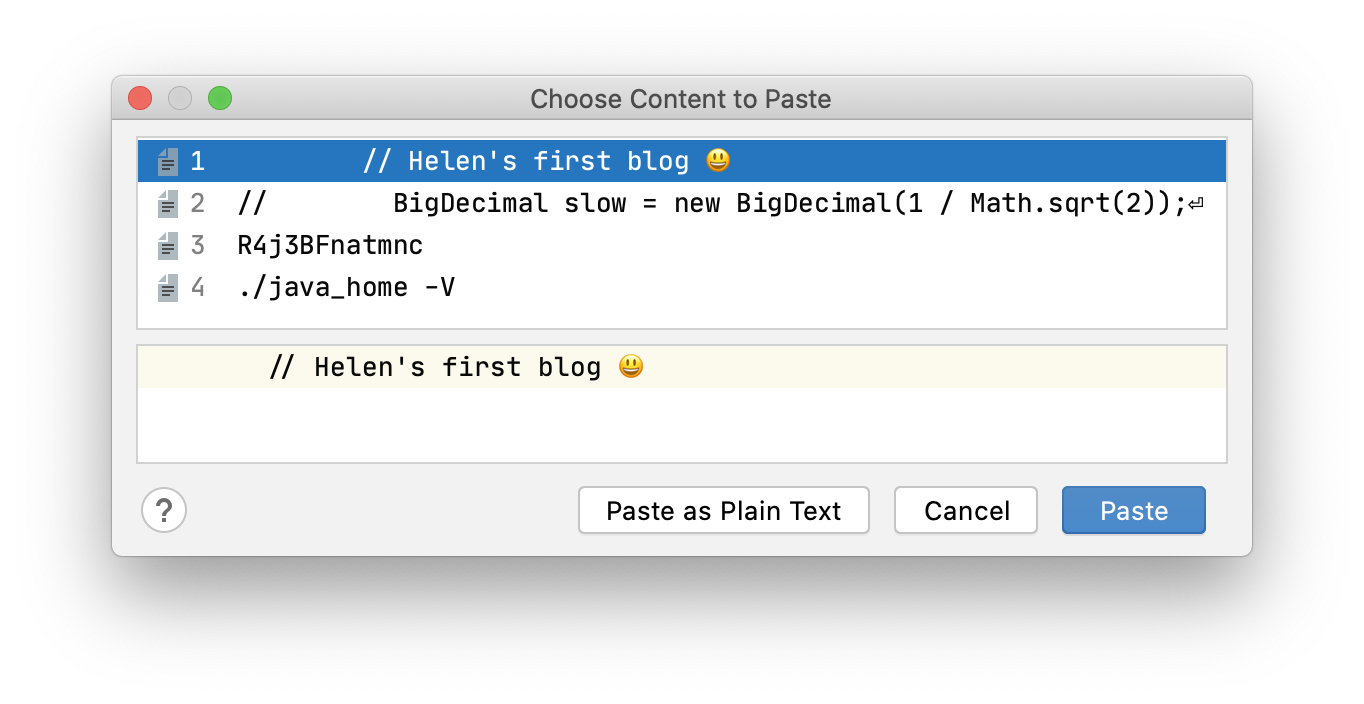
IntelliJ keeps track of everything that you copy.
According to IntelliJ reference:
Local History helps you constantly tracks every change made to a project independently of version control.
Unlike version control systems, which only keeps track of the differences made between commits, Local History offers much more. It automatically records your project’s current state as you edit code, run tests, deploy applications, and so on, while maintaining revisions for every meaningful change made externally and from the IDE.
It also acts as your personal version control system. Local History also lets you restore deleted files, bring back separate changes, or roll back to any state of a file even if no version control is enabled for your project. This happens even if an unwanted change was made after your last commit. It may also serve as a recovery source if your computer restarts unexpectedly before you have the opportunity to take action.
To view this history:
Why do File > New > File > Kotlin class/file every time you create a file? Just assign it a shortcut!
Go to Settings > Keymap > Main Menu > File > New and assign a shortcut to the types of files you create frequently. For example, we use:

CamelHumps is a feature that identifies parts of compound names composed according to CamelCase, wherein each part starts with a capital letter, or when parts of a compound name are separated by underscores. For example, a compound name “MyVideoPlayerUtils” contains “my”, “video”, “player”, and “utils” parts.
By default, IntelliJ won’t honor CamelHumps. You can force it to honor, by simply going to Settings > Editor > General > Smart Keys and tick Use "CamelHumps" words. Using this method IntelliJ will always use CamelHumps. Or you may assign the shortcuts to use CamelHumps sometimes and as needed(search for “in Different “CamelHumps” Mode”).
Do you hate manually adding imports? Well, IntelliJ can do the work for you.
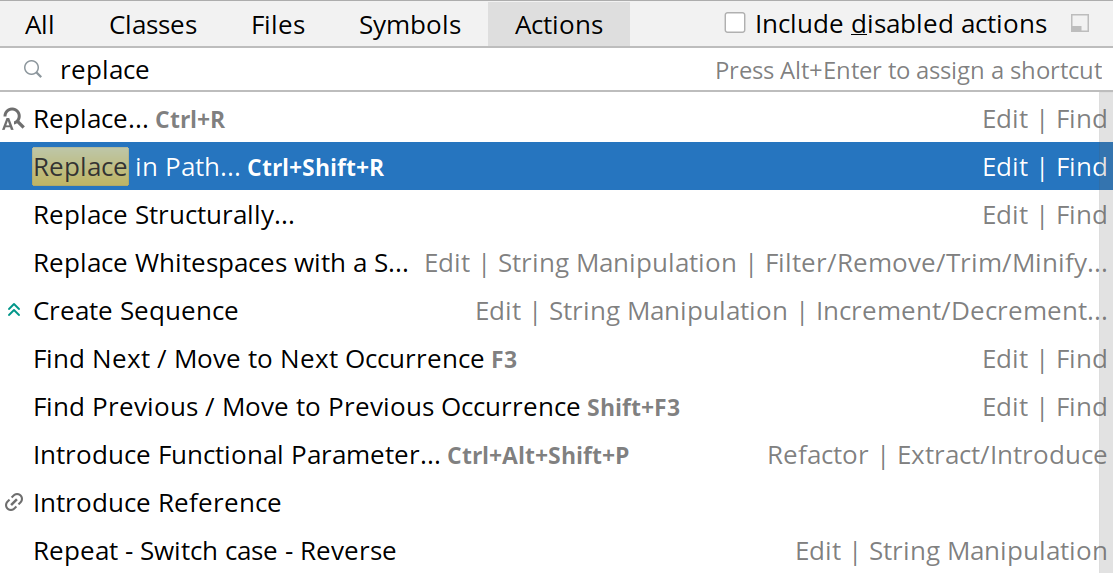
Replace every occurrence in the entire project/module/directory.
This is useful when a dependency has migrated to a different package.
If you include Jira task numbers into commit messages, you can istruct Android Studio to highlight those numbers and also make them clickable.
To enable this go to:
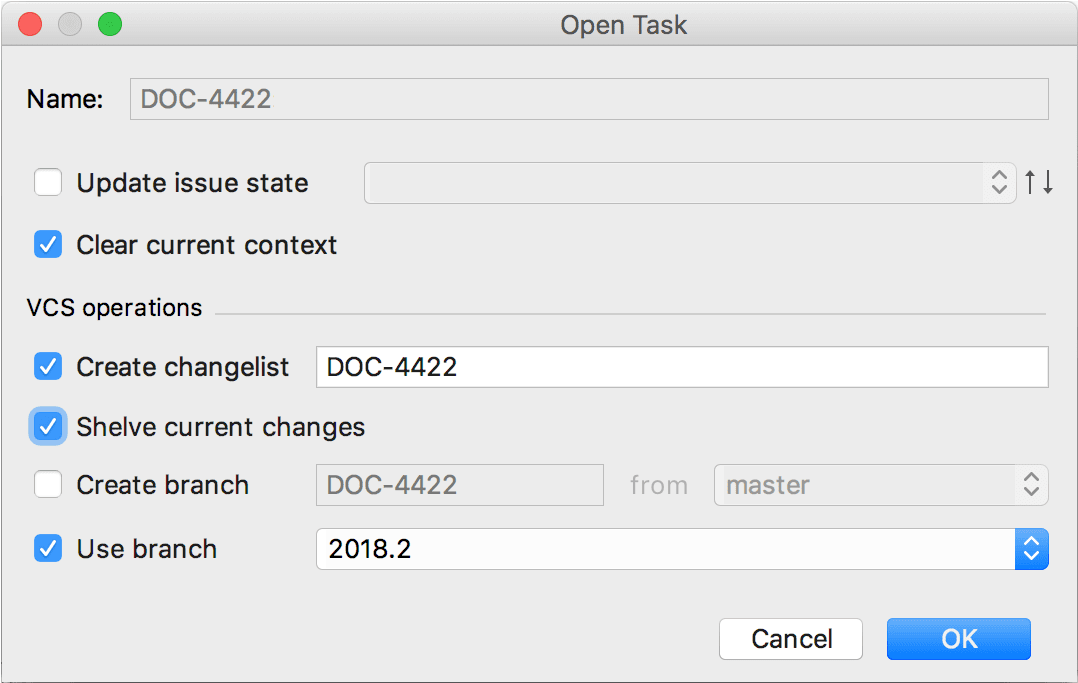

You can also manage Jira tasks right from the IDE. IntelliJ can also:
You can read more here on how to connect IntelliJ with your issue tracker.

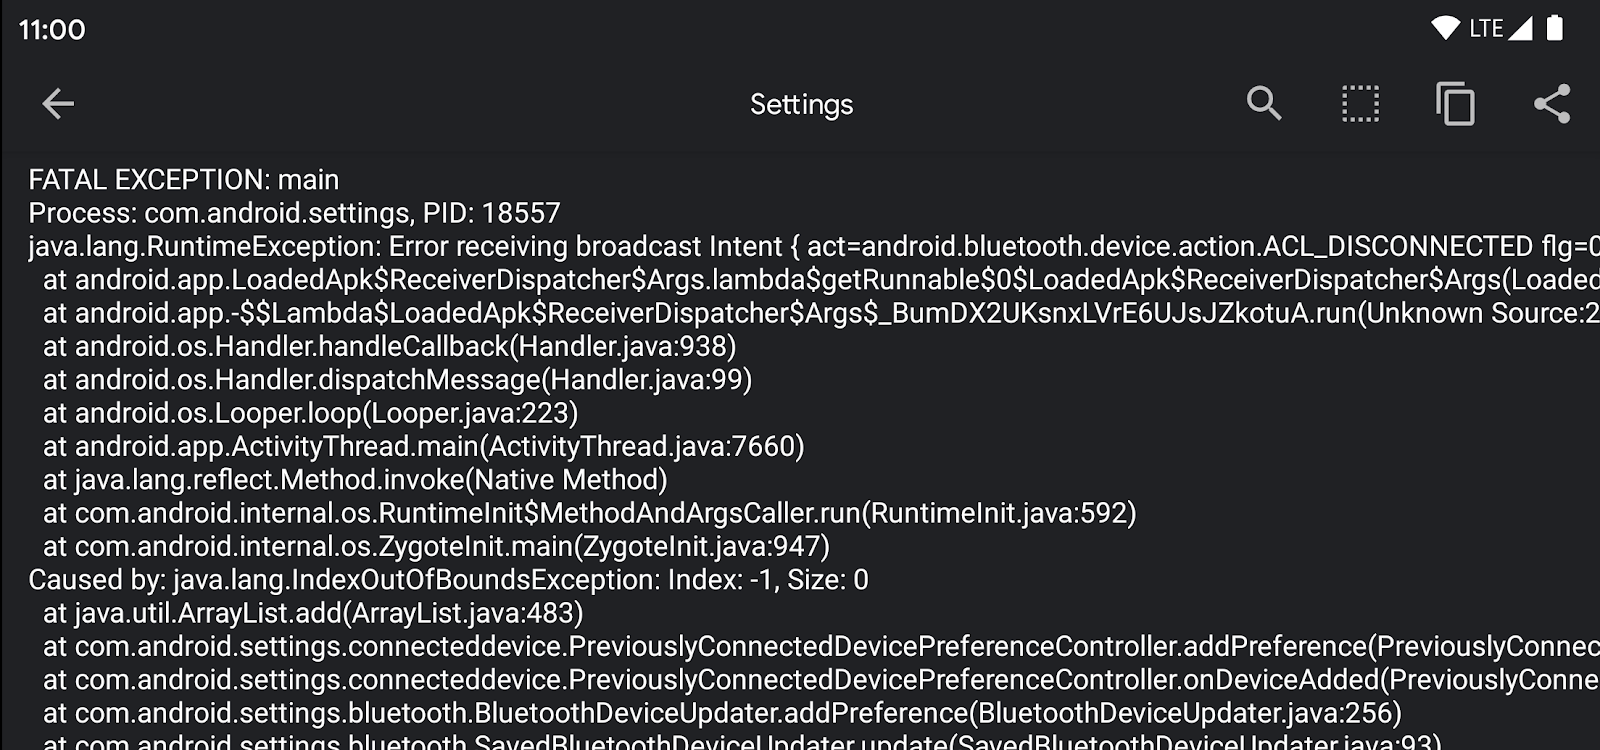
According to @paphonb, the developer behind Scoop:
… [Scoop] saves the stack trace of a crashing app and displays all crashes in a list so you don't have to look through a long logcat anymore. Additionally you get a notification on every crash (configurable) which already displays the most important information.
As seen in the screenshot above, this app not only works with debuggable apps, but also with ANY other app, including system apps. So you can provide a crash stack trace for app developers to make their lives a lot easier. Or you can simply install this app on your QA’s devices and make your life easier.
Originally Scoop was an Xposed module, but you can use it without root.
To set up for non-rooted users:
For rooted users:
If for some reason, Scoop won’t automatically start after restart on my device. It can be manually started. Or you can use Tasker to automate this.
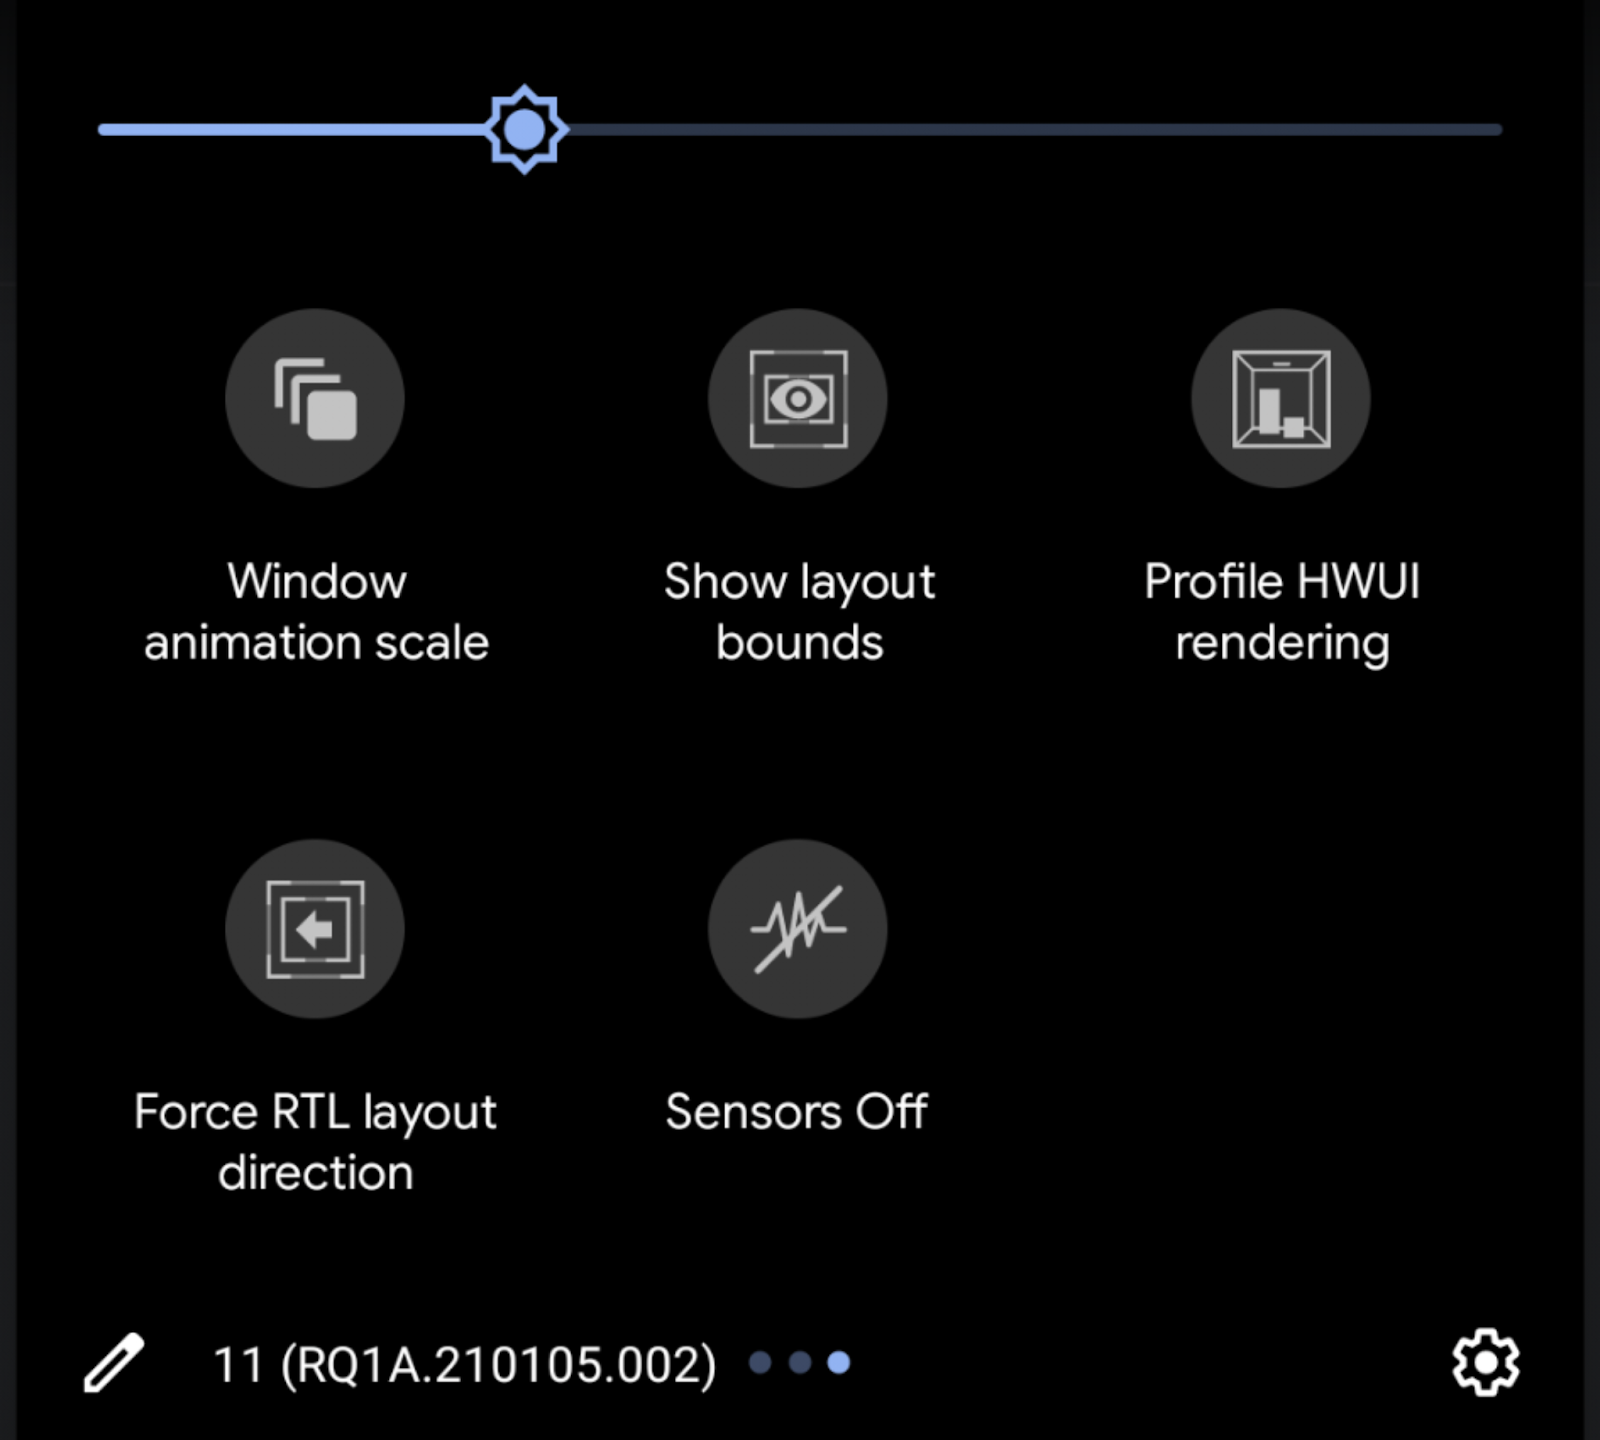
Quick tiles are what is shown when the notification shade is pulled down.
This comes in handy as a quick way to slow down animations or profile rendering.
To enable this feature:
By default, the tiles are added at the beginning, but can be easily rearranged.
Key Promoter X shows a notification every time a button is pressed that has a keyboard shortcut associated with it.
ADB Idea adds useful ADB commands to Android Studio:
JSON To Kotlin Class: Paste a piece of JSON, and it will automatically generate its Kotlin data class representation.
Axon is ready to provide you with senior tech talent and product development expertise to build world-class software. Let's talk about how we can help you.
Some of the most helpful shortcuts include Ctrl + Shift + A (search all actions), Ctrl + B (go to definition), and Alt + Enter (quick fixes). Learning and using these regularly can speed up navigation, code writing, and debugging significantly.
IntelliJ features like live templates, code completion, refactoring tools, and version control integration help reduce repetitive tasks, catch errors earlier, and keep your code clean. These built-in tools are often underused but can greatly improve your daily workflow.
Popular plugins include ADB Idea (quick device actions), Key Promoter X (teaches shortcuts), and Rainbow Brackets (improves code readability). These plugins help tailor the IDE to your habits and make Android development smoother.
Free product discovery workshop to clarify your software idea, define requirements, and outline the scope of work. Request for free now.


[1]
[2]
Leave your contacts and get clear and realistic estimations in the next 24 hours.